How To Install Modal Popup Donation Forms On Squarespace
Modal popup donation forms are a great way to keep donors from diverting to a different page on your website, boosting the likelihood of donations to your cause! In this article, we provide you with step-by-step instructions on how to install your Donorbox modal popup donation form on your Squarespace website.
Looking to install a popup donation form on your Squarespace website? In order to make your checkout process even faster, Donorbox supports modal popup donation forms. This feature allows your donation form to pop up on the same screen.
A donate button will be installed on your webpage. When someone clicks it, the popup form will appear, instead of redirecting your donors to a separate donation page. If you’d rather embed an entire donation form into your Squarespace webpage, check out our handy guide here!
Keep reading for a step-by-step guide that walks you through the process of installing a popup donation form on your Squarespace website.
How to Install a Popup Donation Form on Squarespace [Step-by-Step]
Step 1
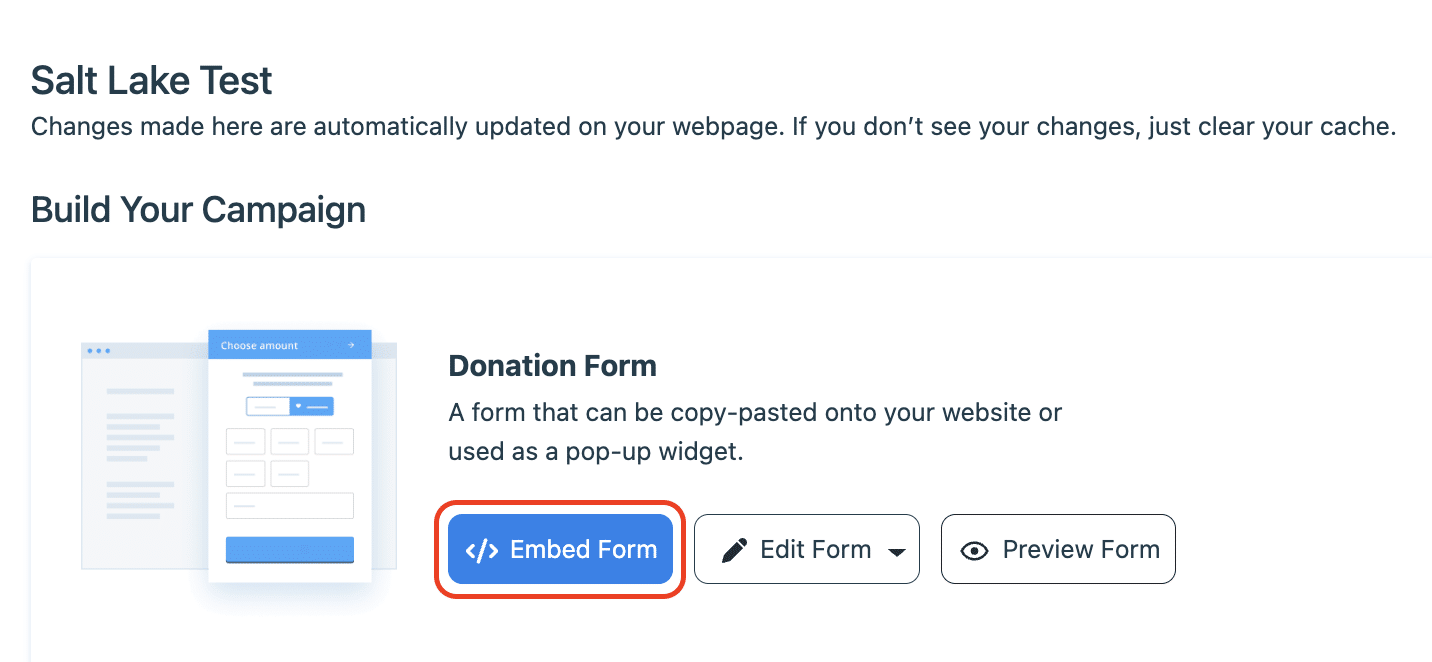
Go to your Donorbox campaigns page and find your desired campaign. Then, click on the “Edit Campaign” button.
Step 2
Select “</> Embed Form.”
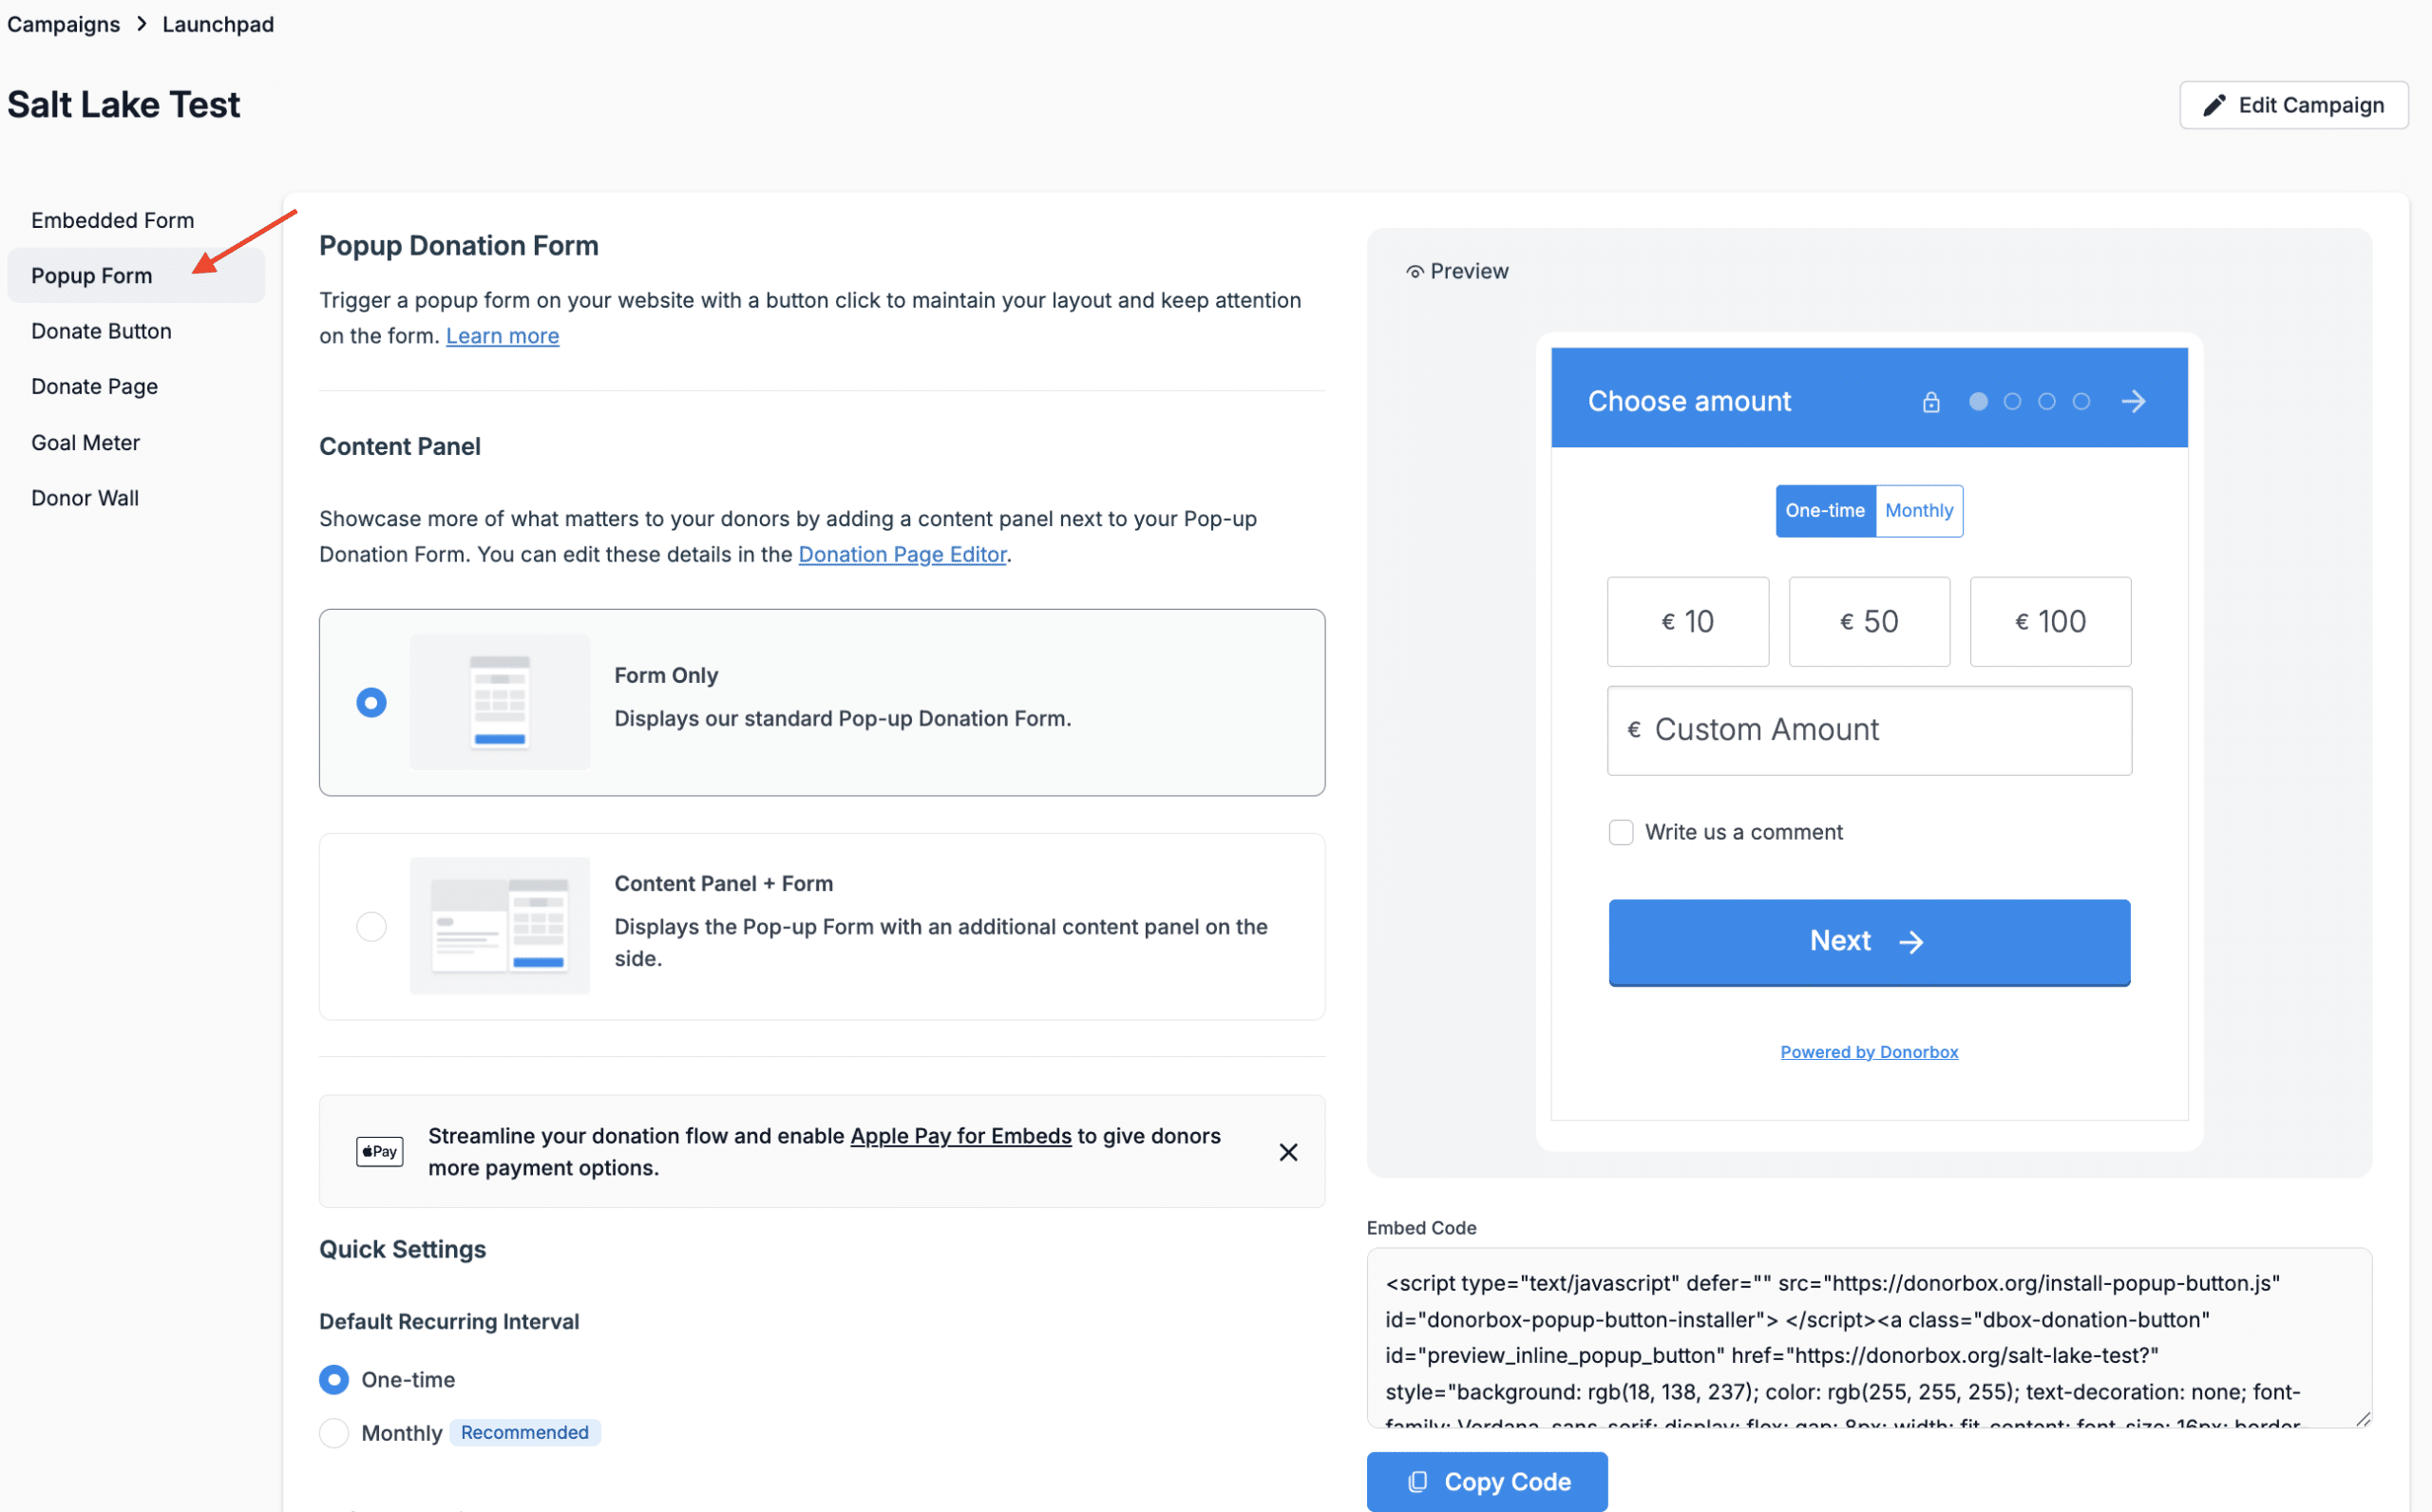
Then, click “Popup Form” on the left-hand side. Here, you’ll be able to change your default recurring interval, edit your button style and type, and more. As you change the settings, you’ll see the code automatically update. Donorbox Pro and Premium users will also have the option to include a content panel alongside their form. Once you’re happy with your changes, click on the “Copy Code” button on the right-hand side. You’ll see it below the preview of your form.
Step 3
Head over to your Squarespace editor. Click the “Pages” button in the left-hand sidebar. If you’ll be adding your popup form to a current page, you can skip to Step 7 below.
Step 4
Click the “+” button to create your new donation page. Alternatively, select “+ Add Page” at the bottom.
Step 5
Select the type of page you wish to create. We’ll be working with a blank page.
Step 6
Name your new page, then click the “Edit” button.
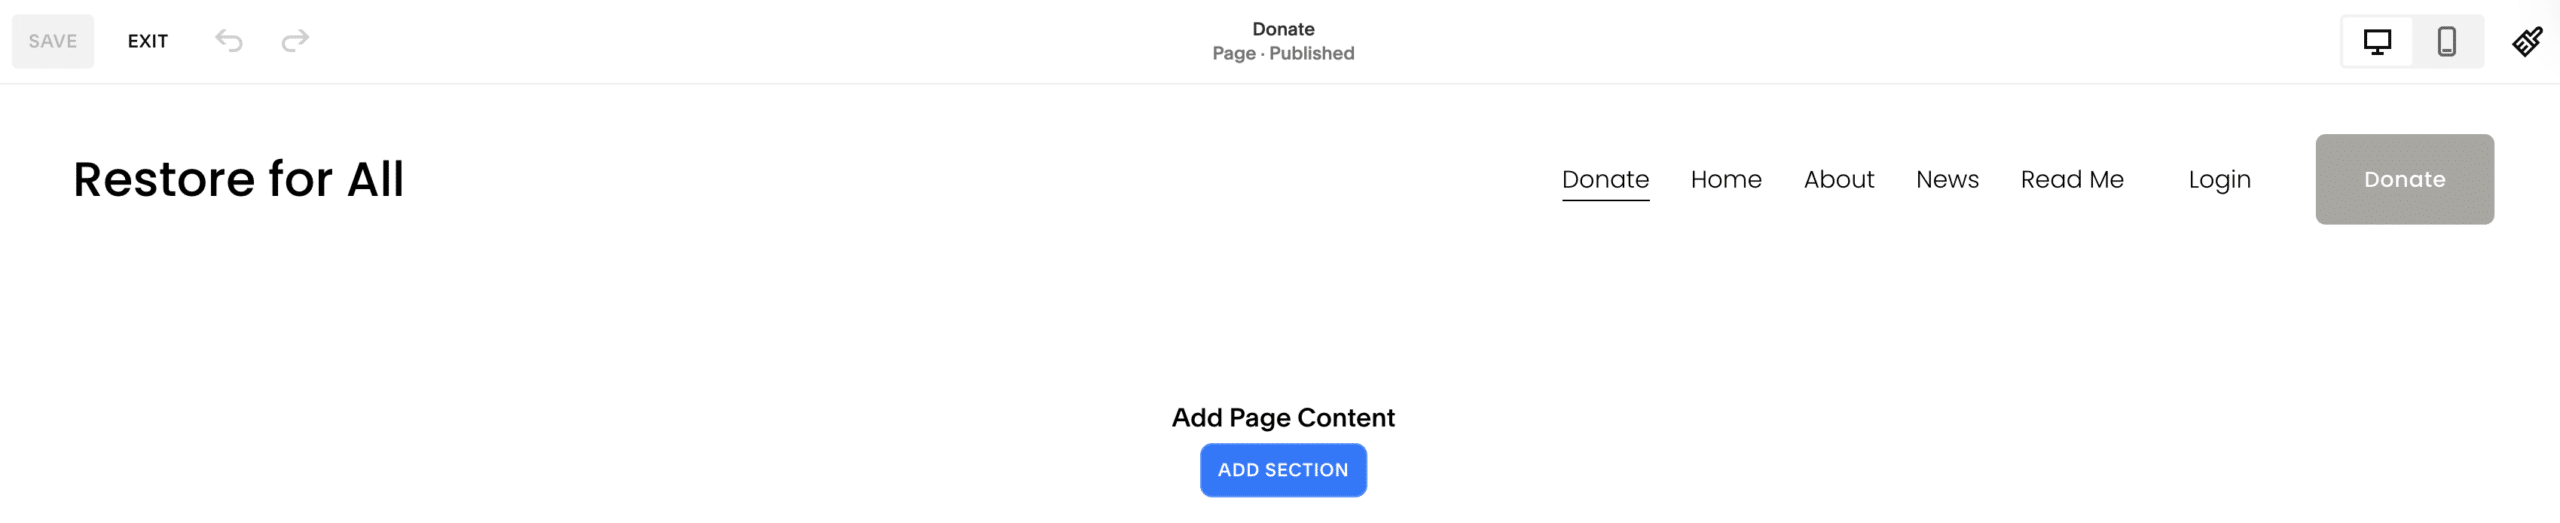
Step 7
Click on the “Add Section” button.
Next, select “Add a blank section,” as shown below.
Step 8
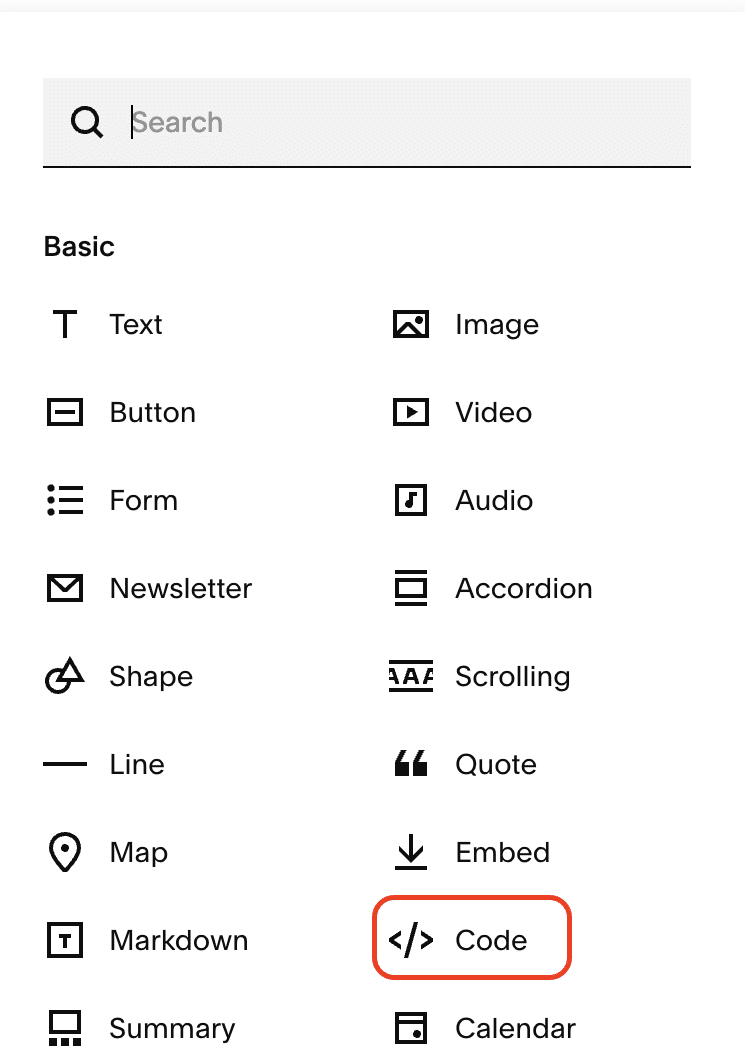
Select “+ Add Block.”
Then, choose “<> Code” from the options available.
Step 9
Click on the edit button at the top left.
Paste the donate button embed code into the textbox on the right.
Step 10
Click the “Save” button on the top left. Your Squarespace donate button should now appear in your website editor.
Step 11
Your new donation page is all set! Here is an example of what your new page and button should look like:
When you click on your donate button, the modal popup form for your Donorbox campaign should appear on the same screen, making the checkout process even faster for your donors!
Conclusion
Installing a donate button that’s linked to your popup donation form is vital to keeping donors engaged on your Squarespace website. Donorbox makes it easy for you to elevate donations to your cause with our handy modal popup form feature, which keeps donors from transitioning to a new page.
We hope you’ve found this step-by-step guide helpful. For more insightful fundraising tips, guides, and ideas, visit our Nonprofit Blog and YouTube channel. Don’t forget to subscribe to our monthly newsletter for exclusive fundraising tips and ideas.
Raviraj heads the sales and marketing team at Donorbox. His growth-hacking abilities have helped Donorbox boost fundraising efforts for thousands of nonprofit organizations.